Wednesday, March 28, 2018

Laundry Room Reveal

Hey guys! It's been awhile since I blogged but I got such great feedback saying you all wanted to see more of my home/projects we do so I'm jumping back onto the blog. The lighting isn't the best in these pictures due to no natural light coming in but here is the end result. 


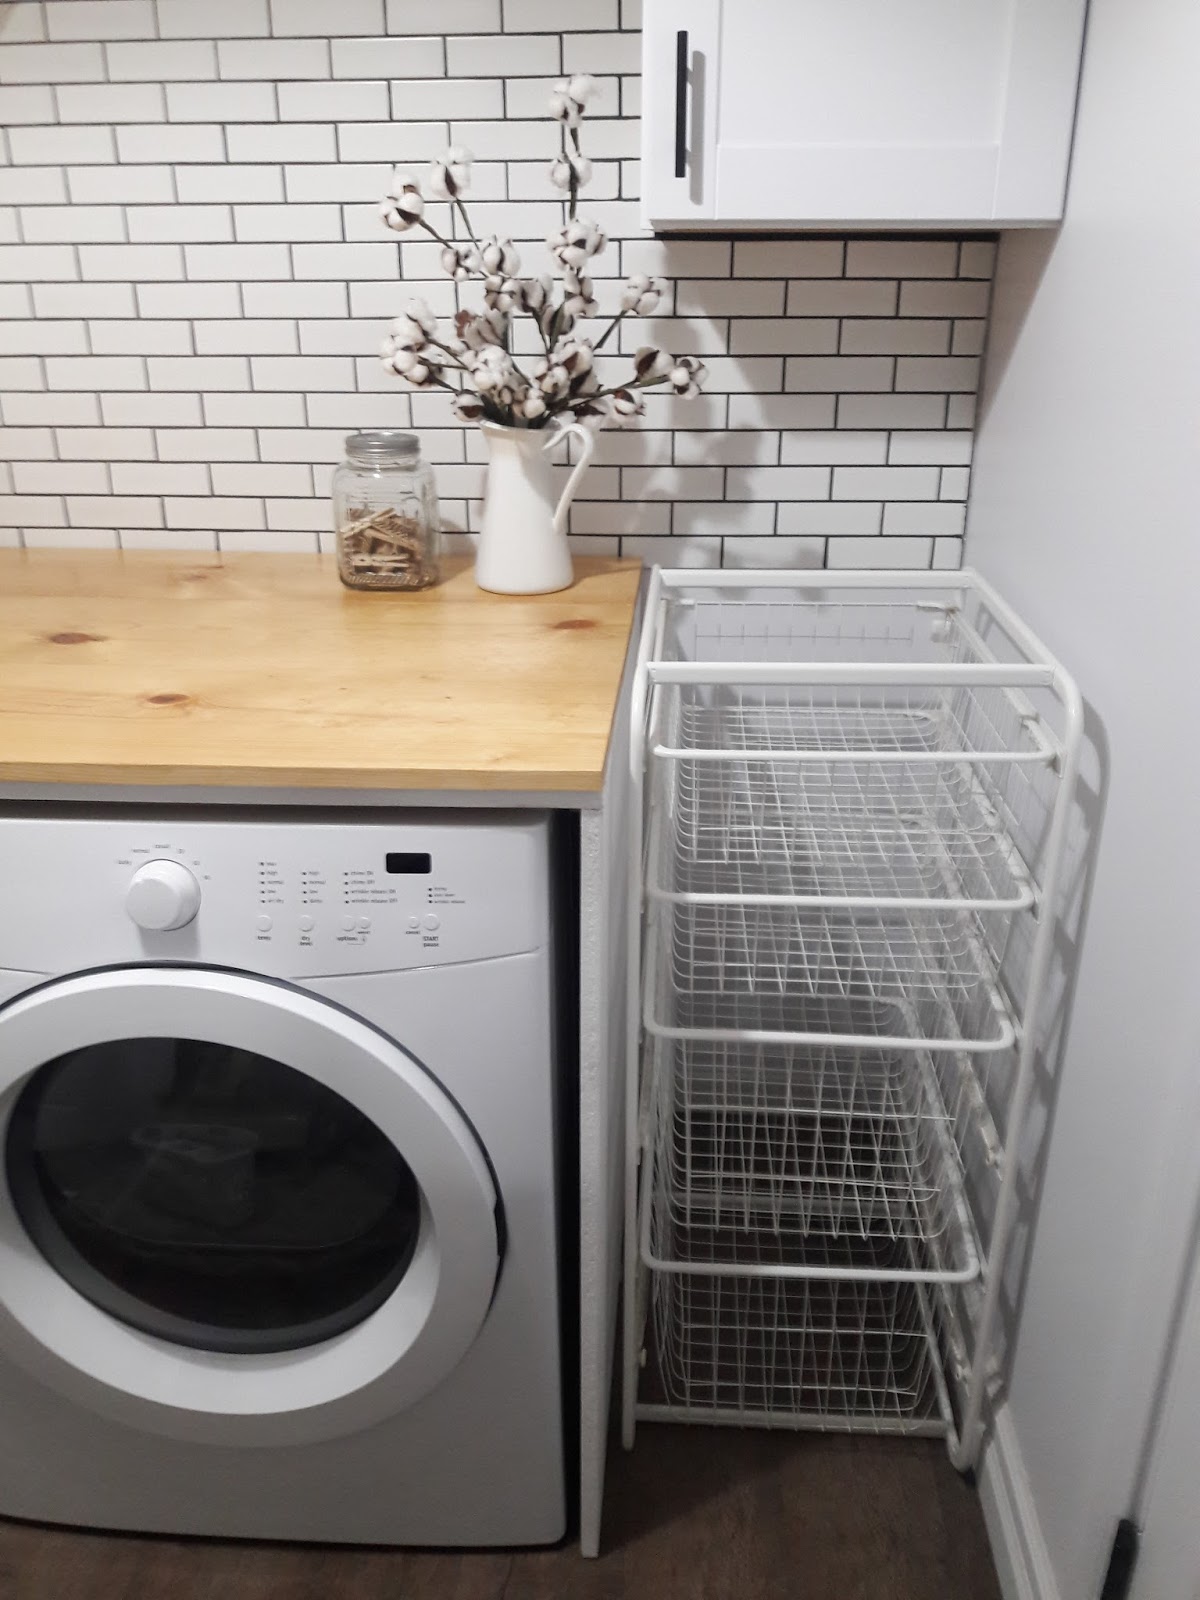
We added cabinets, cabinet hardware, tiled the wall, and added a center bar to hang all the clothes on. I wanted to keep it really fresh and clean with whites and blacks but added a wood counter top so it wouldn't feel too cold. It has a little bit of a farmhouse feel to it with the accessories as well as the laundry sign I painted on a old window panel. Plus the light fixture we made out of an old milk strainer??? I honestly don't know what it is used for on the farm haha but I loved the shape! We purchased a mini pendant kit at home depot and it already had a hole at the top so it was super easy to convert to a light!
Overall I love it, I can actually do laundry now and feel organized and it makes me happy since it's so pretty haha for real though! 
If your wondering where I got everything I will list it below.


Cabinets: Home Depot
Cabinet Hardware: Home Depot
Closet Rod: Home Depot
Laundry Sign: I painted 
Tile: Floor and Decor
Hangers: Amazon
Countertop: Luis made 
Countertop Stain: Mnwax Natural
Metal Basket: The Room Loft
Glass Jar w/ close pins: Walmart
Plant: I've had for awhile - I think it was Micheal's
White Pitcher: Ikea
Cotton: The Room Loft
White Metal Storage Bins: Ikea
Light: Old milk strainer turned into a light with a mini pendant kit from Home Depot 


Sunday, January 31, 2016

Thiago's Nursery

Well after 8-9 months we are finally finished with Thiago's Nursery.
This is what the room looked like before...filled with junk.


We decided to add an accent wall and found a tutorial on pinterest. We used these photos to help us figure out how we wanted the boards on the wall placed.


 This is what our wall looked like after we measured and nailed the boards.
 We used wood filler to fill in the spaces where the boards met. This made for a cleaner look.
Just add a little bit of paint and it looks amazing! Paint color is Sherwin Williams: Agreeable Grey. It is the perfect taupe color!


 I scored these adorable curtains at Tj Maxx. They were exactly what I was picturing for the space.
 Progress-the light has to go...and it did later on!


This was our next project. You can find an awesome tutorial here We added a few more triangles and a different layout to make it our own.

This is the final product (:
I found this other shelf on Restoration Hardware and fell in love with it. We decided we would try to DIY it since we weren't about to pay $329.
We bought some galvanized pipe and put them together to make the top of the shelf where the rope will hang from. Luis cut out three pieces of wood to the dimensions we wanted and then drilled holes where the rope will thread through. 


 Threading the rope through is definitely the hardest part. We used a tape measure and measure the spacing between the shelves but even after we hung the whole shelf up we still had to use a level to get the shelves aligned.


 After a lot of leveling this is what we came up with!

 Love it! I can't remember the exact amount we spent to make this but let me just tell you it wasn't anywhere near $329!
Another project we did was this light fixture. When we saw the light bulbs at Ikea we knew exactly what we wanted to do...the hard part was figuring out how to make it haha! After researching a little we figured out what we would need to make our vision come to life. Sockets, wire, a ceiling plate and some type of cord to hide the wire. Luis and my dad wired the three lights together and hung it. It turned out exactly how we envisioned it!


 Here is the end result (: One spoiled kid!
 These sheets started my whole design. Once I saw them I knew exactly what I wanted to do for the whole nursery. They are definitely the cutest crib sheets ever!!!

 So in love with this rocking chair(:
I still need a changing pad cover but that's about it!


These prints tie everything together (:
Prints from theanimalprintshop.com

Sunday, May 3, 2015

Coming Soon!

Coming Soon! Our DIY outdoor table with beverage coolers in the top! (:

DIY Front Yard Paver Patio

Late last fall we put in curbing around our house and also planted grass. We had this little area right under our window, off the walkway to the front door and I thought it would be fun to put patio pavers down and have and little seating area there.
 We figured the square footage and picked out pavers from Home Depot. Before laying down pavers you will need to put sand down and level out the area.

 We had to use enough sand so that when we laid to pavers down they would be even with the height of our curbing. I was set on a herringbone pattern. It gives it so much more character than just a standard brick pattern. It was a lot of cutting to fit around the curbing but it turned out better than we ever thought!

 We used boards on the edges while we laid the pavers.

 We then cut a few pavers in half and they were the perfect height to line the outside edges. Luis then put stakes down so the edges won't move in time.
 Is that not the most awesome herringbone patio ever!? I love it!
 Its not complete without a super cute patio set from overstock and some decor (:


 I got the tray from Micheals and spray painted it white. Planted some succulents in tin cans, added a solar lantern and some rocks to finish it off.
Now I want to add a few pots of flowers on the side or some lanterns. More pics to come when I get it finished. Overall it's a fun little space that we can now relax on (: